
I recently got a company-issued 13-inch MacBook Pro (2022), so I thought I'd use the opportunity to round up the apps and tools I use regularly. I also wanted to record the little problems I ran into while setting up a new Mac and the settings I ended up using.
Everyday Apps
- Desktop Apps
- Chrome extensions
Development Tools and Software
Developer Tools
Enter git in the terminal. If the developer tools aren't installed yet, macOS will prompt you to install them. After installation, follow 1.6 Getting Started - First-Time Git Setup to set your global Git user information locally.

Homebrew
Homebrew is a package manager for macOS. It lets you download, install, update, and remove software from the terminal, and it handles dependencies automatically, which makes it very convenient. Before installing packages with it, install Homebrew itself by running:
/bin/bash -c "$(curl -fsSL https://raw.githubusercontent.com/Homebrew/install/HEAD/install.sh)"
After installation, remember to run these two lines to add Homebrew to your PATH:
# Write the environment setup for /opt/homebrew/bin/brew to /Users/boshkuo/.zprofile so it loads automatically in each Bash shell session.
(echo; echo 'eval "$(/opt/homebrew/bin/brew shellenv)"') >> /Users/{Your user name}/.zprofile

# Run the environment setup for /opt/homebrew/bin/brew to apply the variables to the current Bash shell.
eval "$(/opt/homebrew/bin/brew shellenv)"
You can now install packages with brew. To install wget, for example, run:
brew install wget
This tells Homebrew to download and install wget. If you've already installed it, Homebrew checks for an update and brings it up to the latest version.
iTerm2
iTerm2 is a popular terminal application for macOS. Compared with the built-in Terminal, it offers more features and customization options. You can change the font, background image, text colors, and other appearance settings to suit your preferences. It also supports saving and sharing themes and layouts, making it easy to share a setup you like or use someone else's.
Another feature that drew me to iTerm2 was its tab and window management. It can split panes and open multiple terminals, much like tmux. I wrote about this in iTerm2 Tips: Shortcuts for Working More Efficiently.
Here are the resources I used for my iTerm2 setup:
- Status bar:
- Color Schemes:
- Keyboard shortcuts:
Oh My Zsh and Powerlevel10k
Oh My Zsh is a framework built around the Zsh shell, with plenty of terminal features and tools. It makes it easy to customize the terminal's appearance and behavior and work more efficiently. It has a range of themes, with Powerlevel10k being one of the most popular. Besides looking good, it offers useful features such as showing the current Git branch and highlighting errors. Oh My Zsh also has plugins for completion, recalling commands, quickly switching directories, and more. They can save quite a bit of time in everyday terminal work.
-
A complete Oh My Zsh + Powerlevel10k setup guide
- My main reference was Setting Up a Good-looking, Practical Command Line with Oh My Zsh + Powerlevel10k. It gives a good overview of installation and how to configure the relevant files.
-
Oh My Zsh plugins
- zsh-completions: Follow the oh-my-zsh installation instructions.
- zsh-autosuggestions: Follow the oh-my-zsh installation instructions.
-
My installation notes
-
Install Oh My Zsh:
sh -c "$(curl -fsSL https://raw.githubusercontent.com/ohmyzsh/ohmyzsh/master/tools/install.sh)" -
Install Powerlevel10k using the officially recommended method for Oh My Zsh:
git clone --depth=1 https://github.com/romkatv/powerlevel10k.git ${ZSH_CUSTOM:-$HOME/.oh-my-zsh/custom}/themes/powerlevel10k -
Add this line to
.zshrcto switch to the Powerlevel10k theme you just installed:ZSH_THEME="powerlevel10k/powerlevel10k" -
Reload the Zsh configuration:
source ~/.zshrc
-
-
My Powerlevel10k configuration
-
Run this command to configure the theme to your liking:
p10k configure -
My Node.js version and icon weren't showing up, so I edited
.p10k.zshto adjust a few Powerlevel10k settings. I enablednode_versionmanually and changed the Node.js icon and colors. You can find icons in the Cheat Sheet.# Show node_version()typeset -g POWERLEVEL9K_RIGHT_PROMPT_ELEMENTS=(...node_version # node.js version)##############################[ node_version: node.js version ]################################ Node version color.typeset -g POWERLEVEL9K_NODE_VERSION_FOREGROUND=240typeset -g POWERLEVEL9K_NODE_VERSION_BACKGROUND=230# Show node version only when in a directory tree containing package.json.typeset -g POWERLEVEL9K_NODE_VERSION_PROJECT_ONLY=false# Custom icon.# typeset -g POWERLEVEL9K_NODE_VERSION_VISUAL_IDENTIFIER_EXPANSION='⭐'typeset -g POWERLEVEL9K_NODE_ICON='\uF898'
-
-
Issue
- When I first opened VSCode's terminal after setting this up, the icons didn't display properly and some characters were garbled. The terminal font was incompatible with Powerlevel10k. Following Setting Up a Nice Terminal in VSCode with Zsh + Powerlevel10k and changing the terminal font to
MesloLGS NFfixed it!
- When I first opened VSCode's terminal after setting this up, the icons didn't display properly and some characters were garbled. The terminal font was incompatible with Powerlevel10k. Following Setting Up a Nice Terminal in VSCode with Zsh + Powerlevel10k and changing the terminal font to
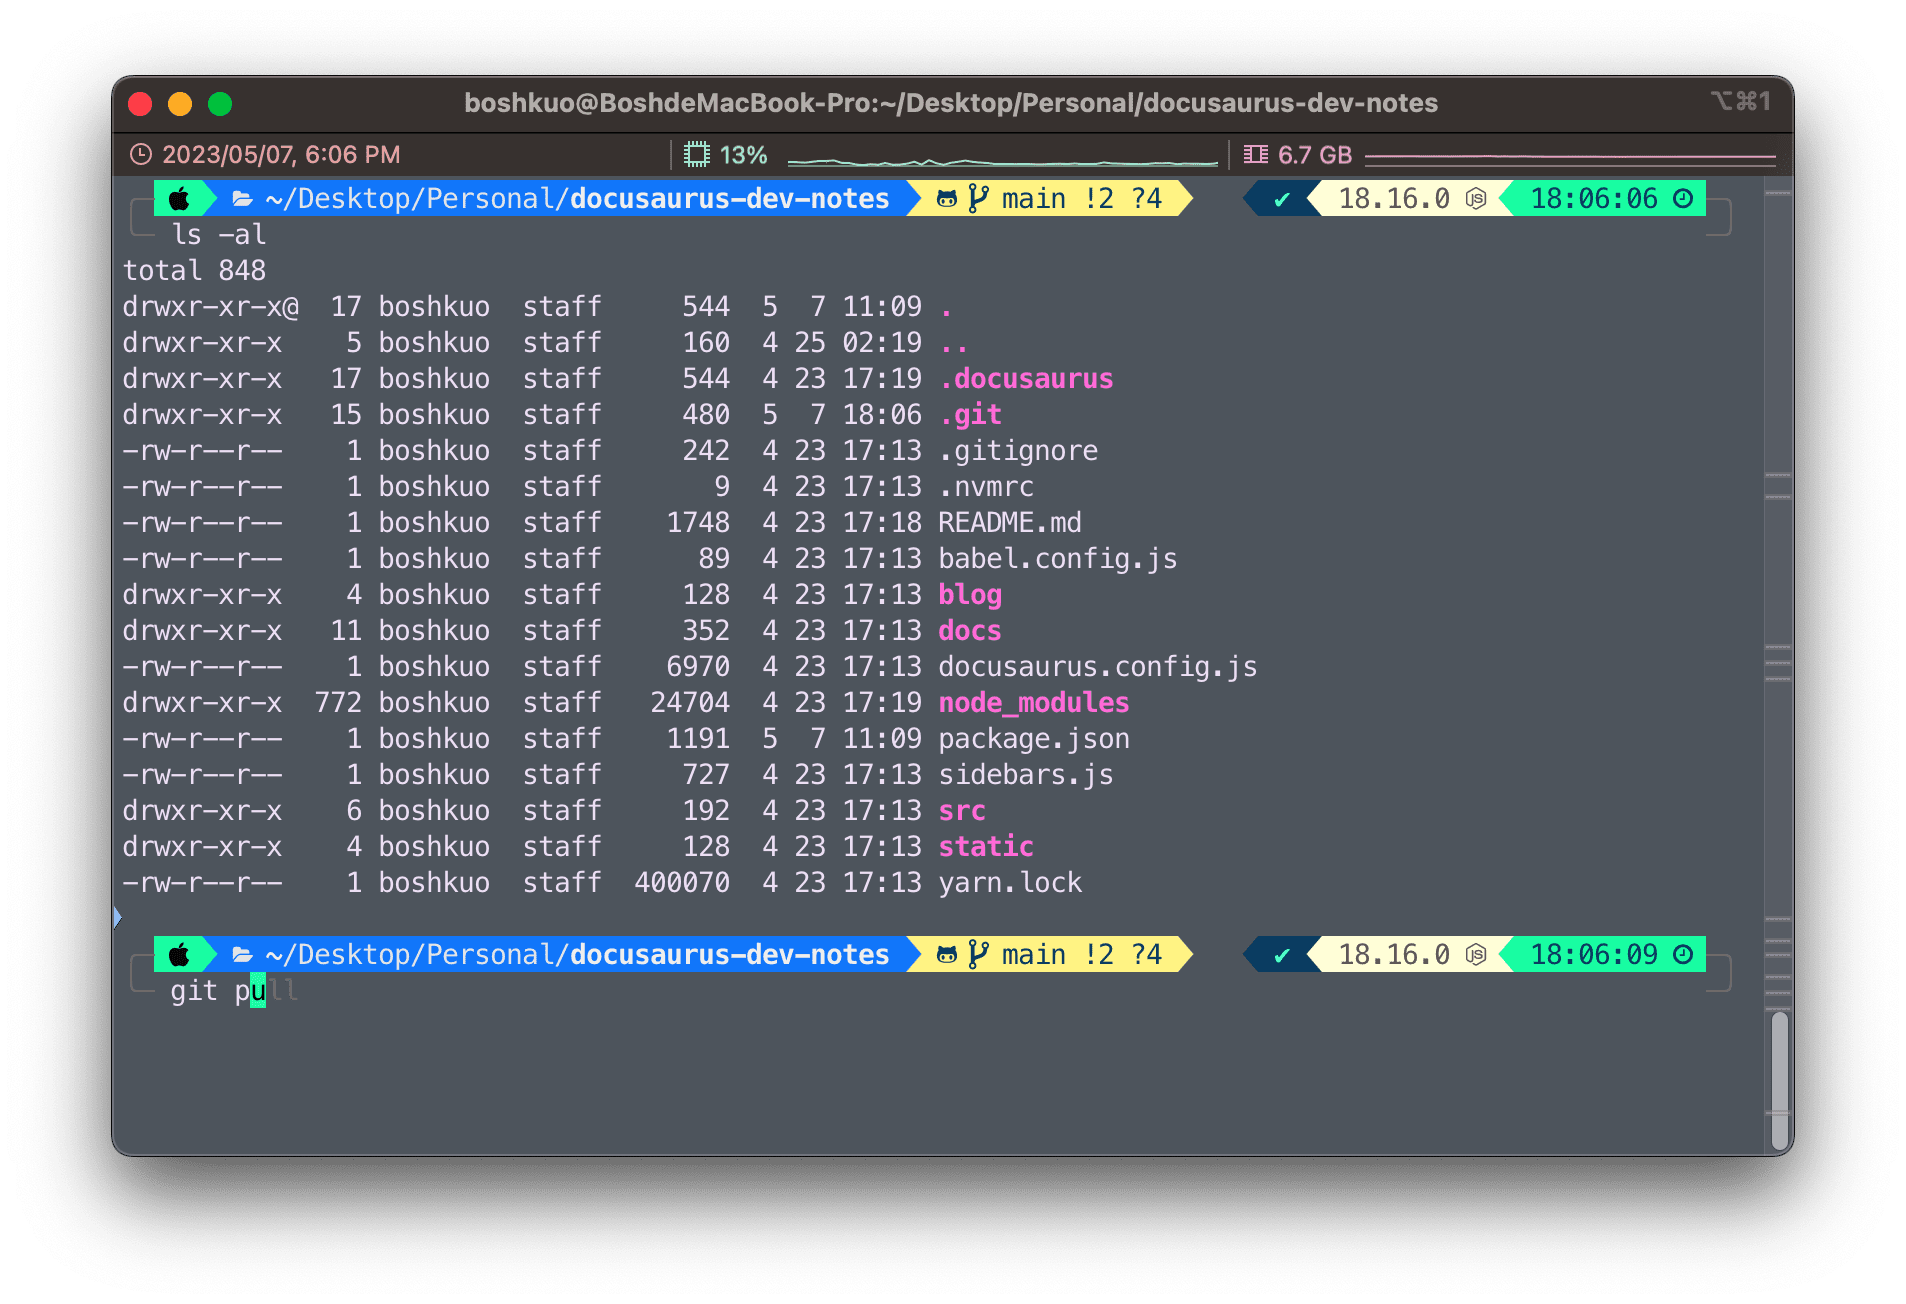
Here's roughly what my finished terminal looks like:
Others
-
- nvm: Installing and Switching Between Node.js Versions (this guide covers everything you need)
-
- Disable automatic activation of the conda base environment:
conda config --set auto_activate_base falseSome guides suggest adding
auto_activate_base: falseto~/.condarc. If that file doesn't exist, use theconda configcommand above, which creates it for you.
Visual Studio Code
Extensions to Install
- VS Code Themes
- GitLens
- Git Graph
- ESLint
- Prettier
- Better Comments
- Auto Rename Tag
- Auto Close Tag
- Auto Import
- Color Highlight
- indent-rainbow
- vscode-styled-components
- Highlight Matching Tag
- Code Spell Checker
- Markdown All in One
- IntelliCode
- Python
- Docker
- Project Manager
- TODO Highlight
- Remote Development
My VSCode Settings
{
  "editor.fontSize": 14,
  "files.autoSave": "onFocusChange",
  "terminal.integrated.fontFamily": "MesloLGS NF",
  "terminal.integrated.defaultProfile.osx": "zsh",
  "editor.formatOnSave": true,
  "workbench.iconTheme": "material-icon-theme",
  "workbench.colorTheme": "GitHub Dark Dimmed",
  // For which languages indent-rainbow should be activated (if empty it means all).
  "indentRainbow.includedLanguages": [], // for example ["nim", "nims", "python"]
  // Using the light mode
  "indentRainbow.indicatorStyle": "light",
  // we use a simple 1 pixel wide line
  "indentRainbow.lightIndicatorStyleLineWidth": 1,
  // the same colors as above but more visible
  "indentRainbow.colors": [
    "rgba(255,255,64,0.1)",
    "rgba(127,255,127,0.1)",
    "rgba(255,127,255,0.1)",
    "rgba(79,236,236,0.1)"
  ],
  // The indent color if the number of spaces is not a multiple of "tabSize".
  "indentRainbow.errorColor": "rgba(128,32,32,0.1)",
  "[javascript]": {
    "editor.formatOnSave": true,
    "editor.defaultFormatter": "esbenp.prettier-vscode"
  },
  "[javascriptreact]": {
    "editor.formatOnSave": true,
    "editor.defaultFormatter": "esbenp.prettier-vscode"
  },
  "[typescript]": {
    "editor.formatOnSave": true,
    "editor.defaultFormatter": "esbenp.prettier-vscode"
  },
  "[typescriptreact]": {
    "editor.formatOnSave": true,
    "editor.defaultFormatter": "esbenp.prettier-vscode"
  },
  "[css]": {
    "editor.formatOnSave": true,
    "editor.defaultFormatter": "esbenp.prettier-vscode"
  },
  "[json]": {
    "editor.formatOnSave": true,
    "editor.defaultFormatter": "esbenp.prettier-vscode"
  },
  "editor.guides.bracketPairs": true,
  "editor.guides.bracketPairsHorizontal": true,
}