2023 菜鳥軟體工程師的 Mac 開發工具配置
最近拿到了公司配的 macbook pro 13(2022) 工作機,趁這個機會整理一下我常使用的軟題和工具,順便記錄一下一台新 mac 安裝各種工具的過程中遇到的小問題以及我做了哪些配置。
日常軟體
- 桌面應用程式
- Chrome extensions
開發工具與軟體
Developer tool
在 terminal 輸入 git,由於尚未安裝 developer tool,系統會跳出安裝提示。安裝好後可參考這篇 1.6 開始 - 初次設定 Git 設定本地 Git Global �使用者資訊

Homebrew
Homebrew 是一個針對 macOS 系統的套件管理器,讓使用者可以方便地透過終端機下載、安裝、更新和刪除各種軟體套件,而且可以自動解決依賴問題,使用起來非常方便。要使用 Homebrew 下載一個套件,首先需要先安裝 Homebrew,可以透過在終端機輸入以下指令來安裝:
/bin/bash -c "$(curl -fsSL https://raw.githubusercontent.com/Homebrew/install/HEAD/install.sh)"
安裝完記得輸入下面兩行將Homebrew 加入 PATH
# 將 /opt/homebrew/bin/brew 的環境設定寫入到 /Users/boshkuo/.zprofile 檔案中以便在每次使用 Bash shell 時都能自動載入這些設定。
(echo; echo 'eval "$(/opt/homebrew/bin/brew shellenv)"') >> /Users/{Your user name}/.zprofile

# 將 /opt/homebrew/bin/brew 的環境設定指令執行,以設定相應的環境變數。這樣可以使得這些環境變數在當前的 Bash shell 環境中生效
eval "$(/opt/homebrew/bin/brew shellenv)"
完成後,就可以使用 brew 指令來下載各種套件了。例如,如果要下載 wget 這個套件,可以在終端機輸入以下指令:
brew install wget
這個指令會告訴 Homebrew 下載並安裝 wget 套件,如果你之前已經下載過 wget,Homebrew 會自動檢查並更新至最新版本。
iTerm2
iTerm2 是一款在 macOS 上常用的終端應用程式,相較於 macOS 內建的 Terminal,iTerm2 提供了更多的自訂選項和功能,使得使用者能夠更方便地進行終端操作。iTerm2 提供了更多的外觀自訂選項。使用者可以自由調整字體、背景圖片、文字顏色等等,讓終端機的外觀更加符合個人喜好。此外,iTerm2 還支援主題和佈局的儲存和分享,讓使用者可以方便地分享和使用自己喜歡的風格。
除了上面提的的功能外,iTerm2 還有一個吸引我的地方,就是他的分頁和視窗管理功能,iTerm2 可以實現 tmux 提供的分割視窗、同時開啟多個終端機等功能,可以參考我之前寫的 iTerm2 技巧大公開:提高效率的快捷鍵 這篇文章。
以下是我的 iTerm2 各個配置的參考資料:
- Status bar:
- Color Schemes:
- 快捷鍵:
Oh My Zsh and Powerlevel10k
Oh My Zsh 是一個基於 Zsh shell 的強大框架,它為終端應用程式提供了豐富的特性和工具。使用 Oh My Zsh,我們可以輕鬆地自定義終端的外觀和行為,並且能夠更加高效地完成終端操作。Oh My Zsh 提供了多種主題供使用者選擇,其中最多人使用的就是 Powerlevel10k,它不僅外觀精美,而且還有許多實用的功能,如顯示當前 git 分支、提示錯誤等等。此外,Oh My Zsh 還提供了許多有用的插件,如自動完成、命令調用、快速切換目錄等等。使用這些插件,我們可以更加快速地完成許多終端操作,節省寶貴的時間。
-
Oh My Zsh + Powerlevel10k 完整安裝與配置教學資源
- 關於 Oh My Zsh 與 Powerlevel10k 的安裝與配置,我主要都看這篇文章:【分享】Oh My Zsh + powerlevel10k 快速打造好看好用的 command line 環境,看完這篇文章應該就會對如何安裝 Oh My Zsh 與 Powerlevel10k 以及要怎麼配置設定文件有個完整的概念。
-
Oh My Zsh plugin
- zsh-completions : follow oh-my-zsh 安裝方法
- zsh-autosuggestions : follow oh-my-zsh 安裝方法
-
安裝紀錄
-
安裝 Oh My Zsh:
sh -c "$(curl -fsSL https://raw.githubusercontent.com/ohmyzsh/ohmyzsh/master/tools/install.sh)" -
安裝 Powerlevel10k (官方建議搭配 Oh My Zsh 的安裝方式)
git clone --depth=1 https://github.com/romkatv/powerlevel10k.git ${ZSH_CUSTOM:-$HOME/.oh-my-zsh/custom}/themes/powerlevel10k -
修改 zshell 的 .zshrc 設定檔,在空白處加入以下這行,把主題換成剛剛安裝的 powerlevel10k。
ZSH_THEME="powerlevel10k/powerlevel10k" -
重新載入 zsh 配置文件
source ~/.zshrc
-
-
Powerlevel10k 配置紀錄
-
輸入下列指令來配置喜歡的 theme
p10k configure -
由於我的 Node.js 版本號以及 icon 沒有顯示出來,因此我修改了 .p10k.zsh 檔案,手動調整了一些 powerlevel10k 的設定,手動開啟顯示 node_version,調整 Node.js icon 與顏色(icon 可以去 Cheat Sheet 找)
# 顯示 node_version()
typeset -g POWERLEVEL9K_RIGHT_PROMPT_ELEMENTS=(
    ...
    node_version            # node.js version
)
##############################[ node_version: node.js version ]###############################
# Node version color.
typeset -g POWERLEVEL9K_NODE_VERSION_FOREGROUND=240
typeset -g POWERLEVEL9K_NODE_VERSION_BACKGROUND=230
# Show node version only when in a directory tree containing package.json.
typeset -g POWERLEVEL9K_NODE_VERSION_PROJECT_ONLY=false
# Custom icon.
# typeset -g POWERLEVEL9K_NODE_VERSION_VISUAL_IDENTIFIER_EXPANSION='⭐'
typeset -g POWERLEVEL9K_NODE_ICON='\uF898'
-
-
Issue
- 剛配置完成時,我打開 VSCode 的 terminal,發現 icon 沒有辦法正確顯示還有出現亂碼字等問題。這主要是因為 VSCode 終端機使用的字體與 Powerlevel10k 不相容,可以 follow 這篇教學文章 在VSCode 裝個漂亮的 Terminal 介面- zsh + powerlevel10k 把 VSCode terminal 的字體改成
MesloLGS NF就可以解決亂碼問題了~
- 剛配置完成時,我打開 VSCode 的 terminal,發現 icon 沒有辦法正確顯示還有出現亂碼字等問題。這主要是因為 VSCode 終端機使用的字體與 Powerlevel10k 不相容,可以 follow 這篇教學文章 在VSCode 裝個漂亮的 Terminal 介面- zsh + powerlevel10k 把 VSCode terminal 的字體改成
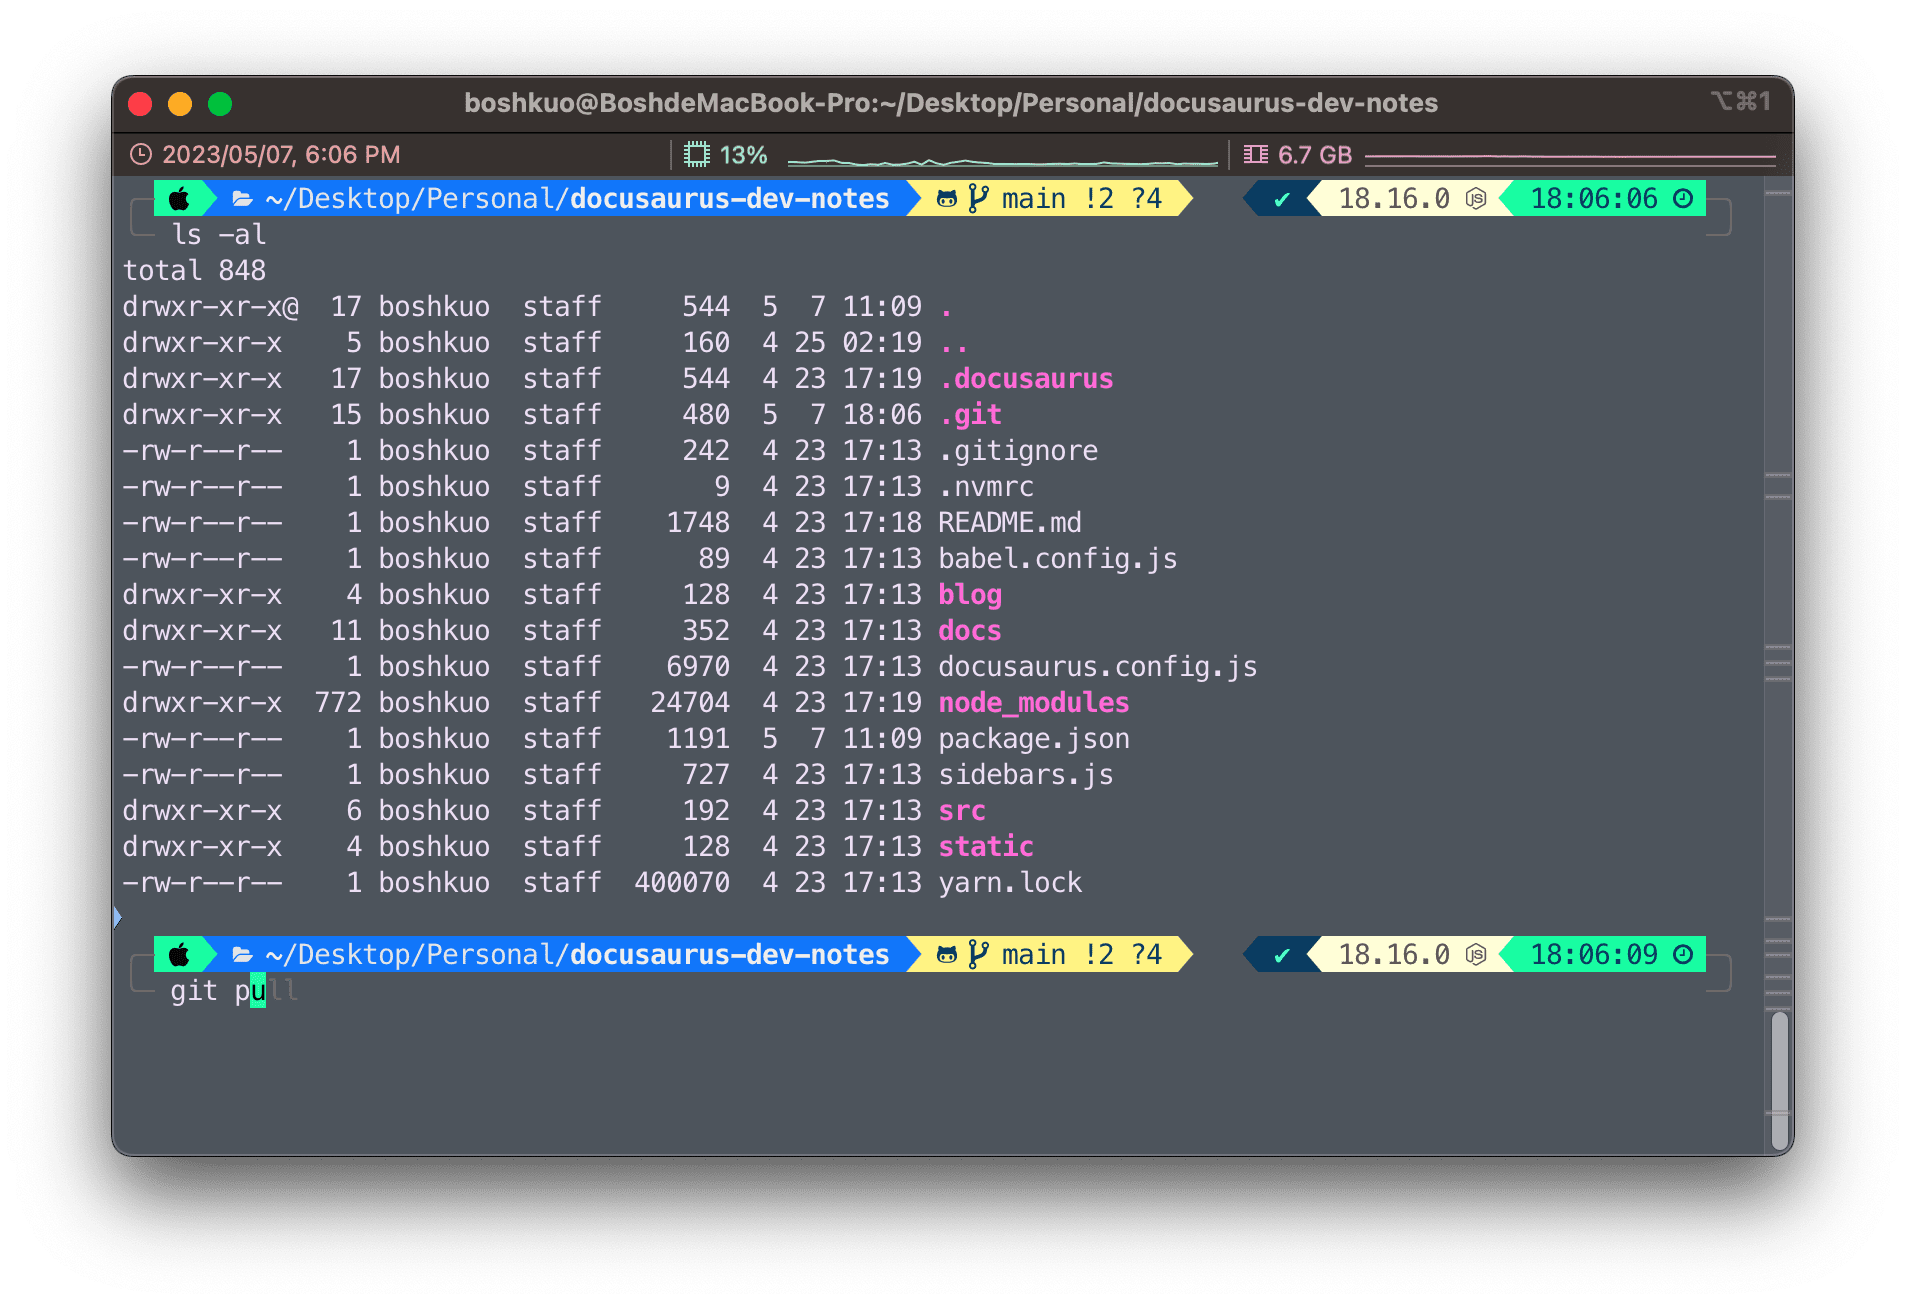
我的 terminal 設置完成後的大概長這樣 ~

Others
-
- nvm:安裝、切換不同 Node.js 版本的管理器 (看這篇就足夠了)
-
- 設置取消自動激活 conda base 環境
conda config --set auto_activate_base false有些教學寫可以在 ~/.condarc 加入這行:
auto_activate_base: false,若/.condarc 檔案不存在則需要用上面的 conda config 指令,/.condarc 檔案就會被建立出來了
Visual Studio Code
推薦安裝套件
- VS Code Themes
- GitLens
- Git Graph
- ESLint
- Prettier
- Better Comments
- Auto Rename Tag
- Auto Close Tag
- Auto Import
- Color Highlight
- indent-rainbow
- vscode-styled-components
- Highlight Matching Tag
- Code Spell Checker
- Markdown All in One
- IntelliCode
- Python
- Docker
- Project Manager
- TODO Highlight
- Remote Development
我的 VSCode 設定檔
{
  "editor.fontSize": 14,
  "files.autoSave": "onFocusChange",
  "terminal.integrated.fontFamily": "MesloLGS NF",
  "terminal.integrated.defaultProfile.osx": "zsh",
  "editor.formatOnSave": true,
  "workbench.iconTheme": "material-icon-theme",
  "workbench.colorTheme": "GitHub Dark Dimmed",
  // For which languages indent-rainbow should be activated (if empty it means all).
  "indentRainbow.includedLanguages": [], // for example ["nim", "nims", "python"]
  // Using the light mode
  "indentRainbow.indicatorStyle": "light",
  // we use a simple 1 pixel wide line
  "indentRainbow.lightIndicatorStyleLineWidth": 1,
  // the same colors as above but more visible
  "indentRainbow.colors": [
    "rgba(255,255,64,0.1)",
    "rgba(127,255,127,0.1)",
    "rgba(255,127,255,0.1)",
    "rgba(79,236,236,0.1)"
  ],
  // The indent color if the number of spaces is not a multiple of "tabSize".
  "indentRainbow.errorColor": "rgba(128,32,32,0.1)",
  "[javascript]": {
    "editor.formatOnSave": true,
    "editor.defaultFormatter": "esbenp.prettier-vscode"
  },
  "[javascriptreact]": {
    "editor.formatOnSave": true,
    "editor.defaultFormatter": "esbenp.prettier-vscode"
  },
  "[typescript]": {
    "editor.formatOnSave": true,
    "editor.defaultFormatter": "esbenp.prettier-vscode"
  },
  "[typescriptreact]": {
    "editor.formatOnSave": true,
    "editor.defaultFormatter": "esbenp.prettier-vscode"
  },
  "[css]": {
    "editor.formatOnSave": true,
    "editor.defaultFormatter": "esbenp.prettier-vscode"
  },
  "[json]": {
    "editor.formatOnSave": true,
    "editor.defaultFormatter": "esbenp.prettier-vscode"
  },
  "editor.guides.bracketPairs": true,
  "editor.guides.bracketPairsHorizontal": true,
}